Table of Contents
Voip
Introduction
The Voip channel is actually a USB sound card with the advantage of having a Mix minus 1 (N-1) and Clean feed output.
The Mix minus 1 prevents the caller from hearing his self by sending back the Mix minus itself (1).
The Clean feed output does the same by sending out the Mix minus itself for the Line input at that channel.
This can be used to connect an external Hybrid like the Hybrid 1, 2 or GSM Hybrid.
Our Voip channel are based on the CM119 USB sound card.
As all the Voip channels work the same way I will call them Voip channel in the instructions.
Voip channels are available for
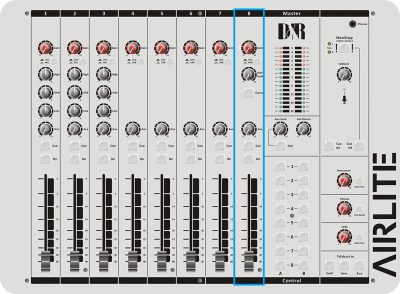
Airlite
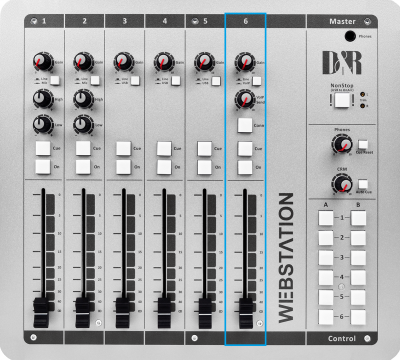
Webstation
Airmate 8 and 12
The front (blue at the picture) is the same as with a telco, it can be recognized at the backpanel by the USB connector.


Airence Main
The front (blue at the picture) is the same as with a telco, it can be recognized at the backpanel by the USB connector.


Airlab
How can I configure the VOIPchannel with a VOIP application?
To use the Voip channel you'll need a Voip application on your computer and you need to setup the application to use the Voip channels “Microphone” input and “Loudspeaker” output.
Download Skype or another Voip application and install it on your PC.
When you connect the USB cable from your Voip channel to your PC, your operating system will see for example the “Airlite VOIP” audio codec and install it as a “Microphone” and “Loudspeaker”.
Since most Voip applications need a “Microphone” input to use for the incomming sound we used the CM119 chip.
Go to the settings of your Voip application and configure the commmunication Microphone and Headphone as the Voip channel source instead of the default Microphone and loudspeaker of the PC.
More information about how to configure your application can find the manual of the Voip application.
If this is done your Voip software recognizes the Voip channel as a headset and will work with all it's audio features.
It is possible to answer and make outgoing calls by opperating the computer but we also added a connect button and signalling feature.
Using the VOIP connect button:
To use the Connect button you'll need the D&R Voip connect application which can be found on the product support and software website.
For the Airlite the firmware needs to be version 1.20 or higher to be able to use this application.
You can find which firmware version is installed in the Airlite Configuration manager after you press Read.
Download and install this application.

When installed the application starts as a “Service” can be found at the taskbar.

When you right click on the icon and press Settings it will open the configuration of the D&R Voip connect application.

Select the model of the Mixing console that you are using.
This application works like a virtual keyboard mapper for most Voip applications.
So when you can “Answer” a call of your Voip application with a keyboard command combination and you can “Hang up” a call of your Voip application with a (different) keyboard command combination, you can configure these keyboard command combinations in the D&R Voip connect application.
Simple translate the keyboard command combinations to the ones in the pulldown setting boxes.
The connect LED setting works for the LED at the Connect switch and for the “Start” jack or “GPO” that is configured as Ring signalling.
When set to “Internal state” both will toggle between “Off” and “On with each press of the Connect button.
Now you are able to Answer and hangup a call with the Connect button.
Control the Connect LED when application fires a command prompt command
To control the connect LED on the voip channel you’ll have to select “Remote Controlled UDP (Phoner app)” can fire
a command with your voip software.
“Voip Connect” -s incoming
“Voip Connect” -s connected
“Voip Connect” -s disconnected
or
c:\Program Files (x86)\D&R Voip Connect\Voip Connect.exe -s incoming
c:\Program Files (x86)\D&R Voip Connect\Voip Connect.exe -s connected
c:\Program Files (x86)\D&R Voip Connect\Voip Connect.exe -s disconnected
These instructions can be added in a batch file which can be started in a hidden situation.
The VOIP led of the button can be set to internal state of the switch, or controlled by the VOIP application (UDP).
Right mouseclick on the blue voipconnect icon that you can find in your hidden icons right under your screen to change settings.
If you still have questions about the Voip channel after these steps fill in the support contact form.
Support Request
Go back to the Airence support page.
Go back to the Airlab support page.
Go back to the Airlite support page.
Go back to the Webstation support page.
Go back to the GSM Hybrid support page.
![]()


